
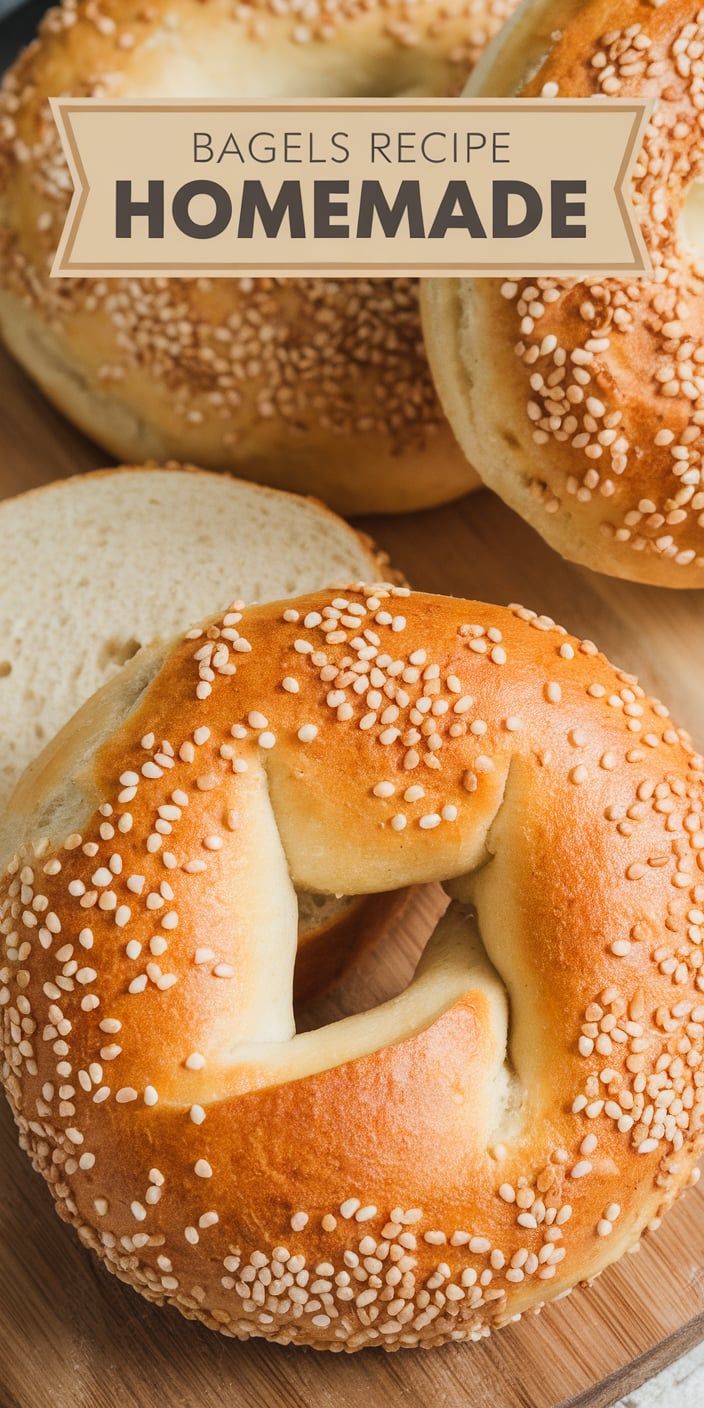
Welcome to the delicious world of homemade bagels! I’m excited to share my authentic New York-style bagel recipe that will transform your kitchen into a small artisan bakery. These bagels aren’t just bread – they’re a culinary experience that connects you to generations of baking traditions.
Creating New York-style bagels at home might seem intimidating, but I promise it’s easier than you think. My homemade bagel recipe will walk you through each step, ensuring you achieve that perfect golden-brown exterior and chewy interior that makes these baked delights truly special.
My passion for bagels began during childhood visits to classic New York delis, where the aroma of freshly baked bread would fill the air. Now, I’m thrilled to help you recreate that magic in your own kitchen. With simple ingredients and a bit of technique, you’ll craft bagels that rival any professional bakery.
Whether you’re a baking novice or an experienced home cook, this bagel recipe will become your go-to guide for creating restaurant-quality bread. Get ready to impress your family and friends with these incredible homemade bagels!
Why Making Homemade Bagels Is Worth Your Time
Crafting bagels in your own kitchen transforms an ordinary morning into a delightful culinary adventure. The benefits of homemade bagels extend far beyond simply satisfying your hunger. By taking control of your baking process, you unlock a world of flavor, nutrition, and creativity that store-bought options can’t match.
Health Benefits of Homemade Bagels
A healthy bagel recipe gives you complete control over ingredients. Commercial bagels often contain preservatives and unnecessary additives. When I bake at home, I can:
- Select high-quality, organic flour
- Reduce sodium content
- Eliminate artificial preservatives
- Incorporate whole grains
- Add nutritious seeds and nuts
Cost Savings of Baking at Home
Cost-effective baking isn’t just a myth. Creating bagels at home can significantly reduce your food expenses. Let’s compare the costs:
| Bagel Type | Store-Bought Price | Homemade Cost | Savings |
|---|---|---|---|
| Plain Bagel | $1.50 | $0.25 | 83% savings |
| Specialty Bagel | $2.50 | $0.50 | 80% savings |
Customization Options
Homemade bagels offer endless possibilities. I love experimenting with unique flavors like jalapeño-cheddar, cinnamon-raisin, or everything bagel seasoning. Dietary restrictions? No problem. You can easily create gluten-free, low-carb, or vegan versions tailored to your specific needs.
Essential Ingredients for Perfect Bagels Recipe Homemade
Creating delicious homemade bagels starts with understanding the right bagel ingredients. Not all ingredients are created equal, and selecting the best components can make a significant difference in your final product.
The most critical ingredient in any bagel dough recipe is flour. I recommend using high-protein bread flour or specifically milled high-gluten flour for bagels. These flours provide the distinctive chewy texture that sets bagels apart from other bread types.
- Bread Flour: 4-5 cups (best flour for bagels)
- Active Dry Yeast: 2 1/4 teaspoons
- Water: 1 1/2 cups (warm, around 110°F)
- Sugar: 2 tablespoons
- Salt: 2 teaspoons
- Barley Malt Syrup: 1 tablespoon (optional but recommended)
When selecting ingredients, quality matters. I always choose fresh yeast and ensure my water temperature is precise. The barley malt syrup might seem optional, but it provides an authentic New York-style bagel flavor that home bakers love.
For those with dietary restrictions, you can substitute ingredients. Whole wheat flour works for a healthier version, while gluten-free flour blends can create alternative bagel dough recipes.
Equipment You’ll Need for Bagel Making
Creating delicious homemade bagels requires the right bagel baking equipment. I’ll guide you through the essential tools and helpful accessories that will transform your kitchen into a professional bagel-making space.
Essential Baking Tools
When preparing to make bagels, you’ll need some critical bagel making tools to ensure success. Here are the must-have items:
- Large mixing bowl for dough preparation
- Heavy-duty baking sheet with parchment paper
- Large pot for boiling bagels
- Sturdy wooden spoon or Danish dough whisk
- Kitchen scale for precise ingredient measurements
Optional but Helpful Equipment
While not absolutely necessary, these additional tools can elevate your bagel-making experience:
- Stand mixer with dough hook attachment
- Silicone baking mat
- Bagel molds or rings
- Instant-read thermometer
- Proofing basket
Smart Bagel Storage Solutions
Proper bagel storage is crucial for maintaining freshness. I recommend investing in airtight containers or resealable freezer bags. These containers will help preserve your homemade bagels’ texture and prevent them from drying out.
With these bagel making tools and storage techniques, you’ll be well-equipped to create professional-quality bagels right in your own kitchen.
The Science Behind Bagel Dough Development
Understanding the science of bagel dough development reveals the magic behind creating perfect, chewy bagels. Gluten formation plays a crucial role in achieving that distinctive texture bagel lovers crave. When flour and water mix, proteins begin an intricate dance that transforms simple ingredients into a remarkable bread product.
Bagel fermentation is a critical process that develops deep flavor and texture. During this stage, yeast consumes sugars and produces carbon dioxide, creating tiny air pockets that contribute to the bagel’s unique structure. The slow fermentation allows gluten formation in bagels to develop fully, resulting in a more complex taste and improved digestibility.
- Protein content in flour directly impacts gluten development
- Longer fermentation times enhance flavor complexity
- Temperature and hydration levels influence dough performance
The chemical interactions during bagel dough development are fascinating. High-protein flour creates stronger gluten networks, which give bagels their signature chewiness. By understanding these scientific principles, home bakers can unlock the secrets to creating bakery-quality bagels in their own kitchens.
Professional bakers know that patience is key in dough development. Allowing sufficient time for gluten to develop and yeast to work its magic transforms ordinary ingredients into extraordinary bagels. Each minute of resting and fermenting contributes to a more flavorful, textured final product.
Step-by-Step Mixing and Kneading Process
Mastering bagel dough kneading is an art that transforms simple ingredients into delicious, chewy bagels. The key to success lies in understanding the dough’s development and learning the right techniques to achieve perfect bagel dough consistency.
When mixing your bagel dough, start by combining dry and wet ingredients until they form a shaggy mass. This initial stage is crucial for developing the right texture and structure of your bagels.
Proper Kneading Techniques
Kneading is essential for developing gluten and creating the signature chewy texture of bagels. I recommend following these steps:
- Knead on a clean, lightly floured surface
- Use the heel of your hand to push and fold the dough
- Rotate the dough 90 degrees between each knead
- Continue for 10-12 minutes until smooth and elastic
Visual Cues for Perfect Dough
Fixing bagel dough requires keen observation. Look for these signs of well-developed dough:
- Smooth, tight surface with no visible tears
- Springs back when gently pressed
- Windowpane test: Stretch a small piece until it becomes translucent
Troubleshooting Common Dough Issues
Don’t worry if your first attempt isn’t perfect. Common bagel dough problems can be easily resolved:
- Dry dough: Add water one teaspoon at a time
- Sticky dough: Dust with additional flour
- Tough dough: Reduce kneading time slightly
With practice, you’ll develop an intuitive sense of bagel dough consistency that will make your homemade bagels truly exceptional.
Shaping and Boiling Your Bagels
Crafting the perfect bagel requires careful attention during the shaping and boiling stages. Shaping bagels is an art that takes practice and precision. I’ll walk you through the essential techniques to create bakery-worthy bagels right in your own kitchen.
Start by dividing your proofed dough into equal portions. Bagel proofing ensures your dough has developed the right texture and flavor. Gently roll each portion into a smooth ball, then create a hole in the center by pressing your thumb through the middle and stretching it out.
- Divide dough into equal-sized portions
- Roll each portion into a smooth ball
- Create a hole in the center
- Stretch and shape until uniform
Boiling bagels is the secret to achieving that classic chewy exterior. The boiling process sets the crust and gives bagels their distinctive shine and texture. I recommend boiling each bagel for about 1-2 minutes per side in water with a touch of honey or malt syrup.
After boiling, transfer the bagels to a prepared baking sheet. This is the perfect moment to add any toppings you desire. Whether you’re going for classic sesame or everything seasoning, sprinkle them on while the bagels are still wet so the toppings stick perfectly.
Pro tip: Make sure your water is at a gentle simmer when boiling bagels. Too rapid a boil can tear the delicate dough surface and disrupt the beautiful shape you’ve worked hard to create.
Toppings and Flavor Variations
Creating delicious bagel toppings is an art that transforms ordinary bread into a culinary masterpiece. Exploring different bagel toppings can elevate your homemade bagels from simple to spectacular, offering endless possibilities for flavor and texture.
Classic Bagel Toppings
When it comes to how to top bagels, traditional options never disappoint. I recommend these classic bagel toppings that bring authentic flavor:
- Sesame seeds – provides a nutty crunch
- Poppy seeds – adds subtle earthiness
- Everything bagel seasoning – delivers complex flavor profile
- Coarse sea salt – enhances overall taste
- Dried onion flakes – brings savory depth
Creative Flavor Combinations
For adventurous bakers seeking unique flavored bagels, experiment with these innovative combinations:
- Cheddar jalapeño – spicy and cheesy
- Cinnamon raisin – sweet and comforting
- Garlic herb – aromatic and rich
- Rosemary olive – Mediterranean-inspired
Application Methods
Mastering bagel toppings requires proper application techniques. I suggest using an egg wash to help toppings adhere during baking. Simply brush beaten egg over shaped dough, then sprinkle your chosen toppings immediately before placing in the oven.
Pro tip: Apply toppings just before baking to ensure maximum flavor and crispness. Experiment and have fun creating your perfect bagel!
Storage Tips and Reheating Methods
Storing homemade bagels correctly can help preserve their delicious flavor and texture. I recommend keeping freshly baked bagels at room temperature in a sealed plastic bag or bread box for up to two days. If you want to extend their shelf life, freezing bagels is an excellent option that helps maintain their quality for several weeks.
When it comes to reheating bagels, I’ve found the best method is using a toaster or toaster oven. For frozen bagels, thaw them at room temperature for about 30 minutes before toasting. Slice the bagel in half and toast until it reaches your desired level of crispness. If you prefer a softer texture, wrap the bagel in aluminum foil and warm it in a preheated oven at 350°F for about 5-7 minutes.
Freezing homemade bagels is surprisingly simple. First, ensure they are completely cooled after baking. Wrap each bagel individually in plastic wrap or aluminum foil, then place them in a freezer-safe bag. This method prevents freezer burn and makes it easy to remove just one bagel at a time. Properly stored frozen bagels can last up to three months without losing their taste or texture.
Pro tip: If you want to prevent your bagels from becoming too dry when reheating, lightly sprinkle water on the surface before toasting. This trick helps restore some of the moisture and gives you that fresh-baked feeling every time you enjoy your homemade bagels.